Lab Exercises: Exploring Emerging Technologies and Immersive Design
One of the most impactful effects of 360-degree videos is their user engagement. Interactive video draws people into the curiosity zone, and 360-degree videos take advantage of this curiosity. Viewers view the video longer and interact more with the brand.
(RepuNext, 2025)
The curiosity zone is about how ‘specific pieces of missing information can prompt a strong desire to fill those gaps’ Kevin McDonnell (2022). Utilising this with graphic design can increase engagement with a user as ‘curious designs reel you in’. (Brown, E. 2015)
360 content:
Maya+ Blender
Maya
I initially followed a guided tutorial to construct a basic 360° video of a table with some objects on top of it as this was my first experience producing a 360° video using Maya.
To begin creating the table scene in Maya, I started by adding a cube and adjusting its height and length to form the tabletop. I then duplicated rectangular shapes and positioned them underneath to create the legs of the table. Once the basic structure was complete, I added a cone, circle and a square to the top of the table to make the scene more visually interesting. Each object was given a basic colour to help distinguish between the different shapes.
For the lighting, I used a Skydome Light to create a natural illumination across the scene which helped to make the objects appear more realistic. I positioned the camera near the table so that the scene could be viewed clearly from a 360° perspective.
After setting everything up, I rendered the video and imported it into Adobe Premiere Pro, where I selected the VR Video option and changed the layout to monoscopic so it could be properly displayed as a 360° scene.
As I have used Blender previously, i decided that i will use blender instead of maya as i find that the user interface is more intuitive to use and the layout of the software is less overwhelming to look at.
Blender
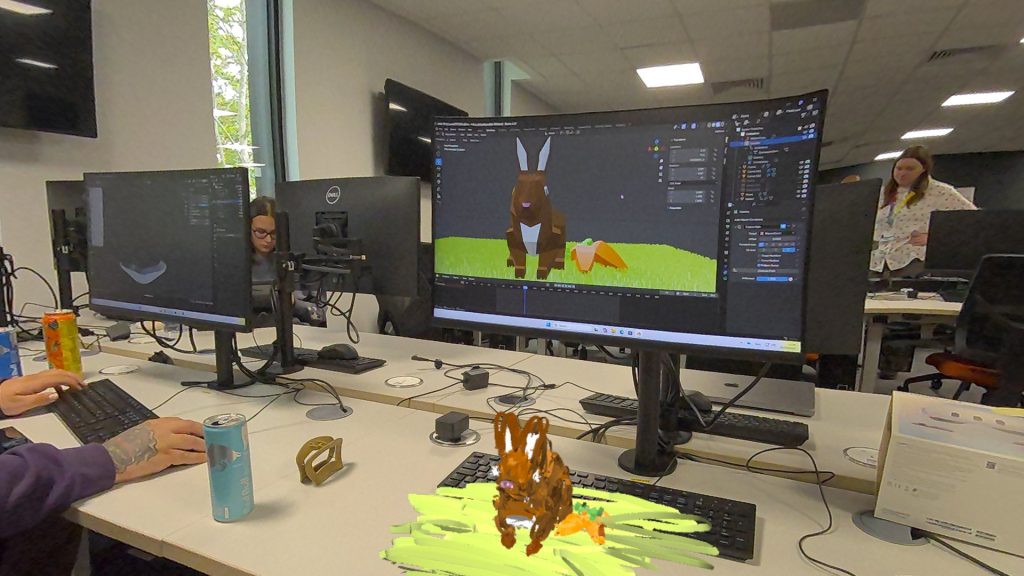
I wanted to create a scene that people would look at and feel calm, One of the ways i could create a calm atmosphere was by taking a favoured animal that many people love and create a scene based on this animal. I chose to create a rabbit as it is a docile, fluffy animal that is loved by many people, I wanted people to have a 360 of the rabbit so that they can look at all the features on the rabbit; to do this i added a camera that spins around the rabbit so viewers can pause the video at specific angles of the rabbit and have a look around the scene. By having the camera rotate around the rabbit, it allows the viewer to feel more immersed in the space as they can control where the camera is.
To build a calm and cosy atmosphere, I focused primarily on the use of light and colour. I used a natural light source-the sun-to illuminate the scene, creating gentle, realistic shadows that suggested warmth and comfort. The rabbit was coloured in a warm tone of brown to increase the feeling of cosiness and to subtly contrast with the cooler greens of the grass texture. Together, the natural lighting and earthy colours helped evoke a peaceful, sunlit environment that feels inviting and safe.
I wanted viewers to feel free to explore the 360° scene in their own way rather than following a fixed path. The open space was designed so the viewer did not feel trapped in a box/ room and allows the user to feel calm and relaxed and encourages them to look around the scene at their own pace without having a fixed path to look at.
To support this sense of open exploration, I modelled a carrot and then duplicated it and put it next to the model of the rabbit to give the viewers something to move the camera to look at and to make the scene feel a bit more realistic, i added in a grass texture to the plane and added natural lighting to the scene which increases how immersed the viewer is. I positioned the rabbit so that it faced toward the sun to help give the impression that it was basking in the sun to help create a sense of calm and comfort which would help the viewers subconsciously associate the scene with peaceful, cosy feelings.
This scene could be developed further to be used children who naturally enjoy exploring and interacting with immersive environments, being able to control the screen encourages curiosity and engagement which makes the experience playful and memorable.
Additionally, the scene could be adapted by authors or illustrators to bring a storybook to life, allowing readers to step into the world of a book and explore its settings in 360°. Such applications highlight the versatility of 360° content in both educational and creative storytelling contexts.
Similar to Maya, I had to change the render settings
and then upload it to Adobe Premier Pro and adjust the settings so it was compatible with 360 movement.
 The beginning process of creating the table in Maya. I added in a cube and adjusted the height and length.


(Open in YouTube app if it is not working)
Link to video: https://www.youtube.com/watch?v=vs6vJRMZvXk
 Creating the rabbit in blender with the mirror effect added to make sure the rabbit is design proportionally


Pause the video at a specific angle you want and then have a look around.
(Open in YouTube app if it is not working)
Link to video: https://www.youtube.com/watch?v=iW__hCN8N6k
Frame VR
Alternatively, I created a world on Frame Vr, whilst using this site, i found that creating a 360 space was easier than creating it all on blender /Maya as i have to animate the camera, however frame VR already has a camera set up, so i only need to create /build models for the space.
To accurately see which software was easier for me to use, i decided to create a scene in Frame VR which would also be based around creating a calming atmosphere for the viewer. I used a pre-made tree within Frame VR and used it as a focal point, and then i imported my rabbit model and a pond model. It was easy to duplicate/ add in multiples of the same model and re-size them. I did find that the camera angles are hard to adjust sometimes – especially if you are wanting to look at a specific angle- but it is still effective to create 360 spaces as well as being effective as a user on the site as it allows more interactivity as you can control movement and camera angles.
I also created an audio/sound visualiser as a way to further develop my rendering, animation, and digital design skills. Using a snippet of Willow by Taylor Swift from the Eras Tour, I look at how to translate auditory information into visual form. When choosing the design of the visualiser, I selected colours and visual elements inspired by the Evermore album, ensuring a cohesive and expressive visual representation.
This project allowed me to experiment with the software more and use features I had never used before – such as problem-solving abilities. It also provided an opportunity to refine my understanding of how motion, composition, and visual hierarchy can work together to create an engaging and dynamic experience. Overall, the visualiser served as a focused exercise in combining technical skill with creative decision-making, strengthening my confidence in producing complex digital designs and animations.
 I first joined my scene and had a look at the pre-made objects it gives you.


Augmented Reality
When designing the AR experiences, I considered how users would interact with the content. For example, I ensured that objects could be placed intuitively by tapping the screen, giving clear and simple control over interactions.
I also paid attention to the scale of objects, making sure they appeared natural within the user’s environment, and checked that nothing clipped through other elements. These considerations helped contribute to the experience to help make the experiences believable and easy to navigate which enhances the user engagement and immersion.
The first thing i created on 8th wall was a practice animation to understand how to animate and how to give objects features such as shading and adding gravity to it. Once i completed a simple tutorial, i then moved on to create my own video that utilises the gravity feature. This time, i wanted to create a video that would entertain viewers so i took inspiration from a video of a rabbit that presses a bell and carrots drop from the sky and made my own version of it. I tested each interaction multiple times to refine object placement, scale, and animation timing eg. I adjusted the rabbit animation in the gravity video to ensure the carrots dropped naturally.
Image Targets + World Effects
For image targets i took a drawing i have made and turned it into an image target. I wanted to use the image target feature so people could scan a poster and then it would show users sculptures/ products you can buy (In this case, a miniature sculpture of two ducks in a bath). As the site i used to create it is 8th wall, it meant that i could import my blender file and adjust the scene accordingly.
To expand on the idea of looking at products by scanning a poster, I added the sculptures of the ducks in the bath to a world effect so people can tap their screen and then see what the sculpture would look like in their homes. This feature is particularly useful for companies like IKEA which let users try an item from their store into your home, similarly, apps like Pokémon go also utilise this feature, enhancing gaming experience.
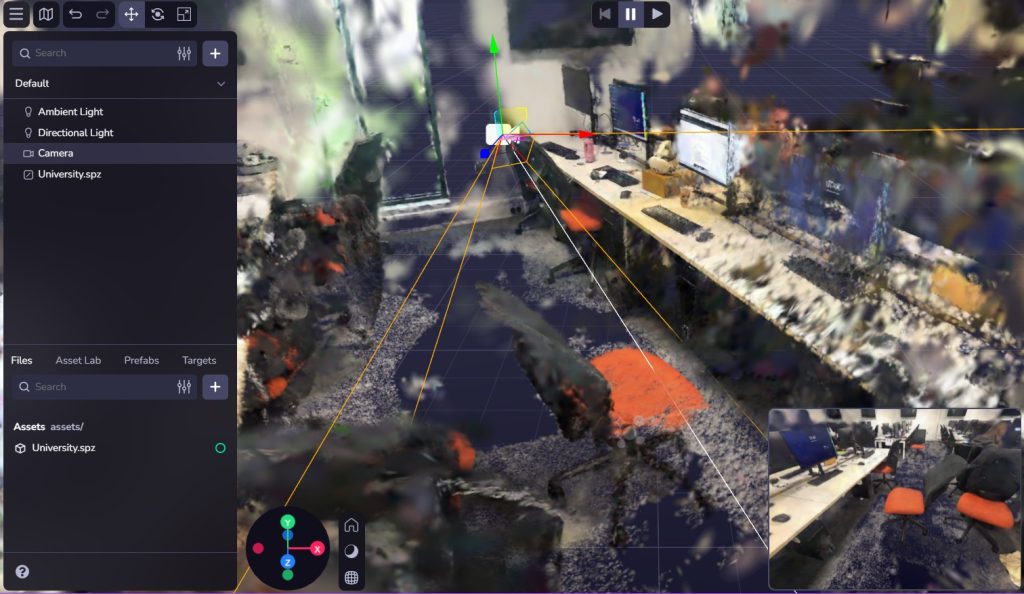
Scaniverse
Scaniverse allows you to scan an object and create a 360 image render of it, you can then import it into 8th wall and create a scene that people can move around. This feature would be particularly useful for advertising things such as movies / tv shows, especially if they have items that are popular among fans i.e Glindas wand from wicked the musical.
Face effects
I designed a seasonal hat for people to wear on blender and then imported the file to 8th wall where i adjusted the hat on top of a pre-made face scan. The face effects could be developed into a promotional campaign for movies or theatre productions, as an example, for Wicked the Musical, users could wear Glinda’s crown or Elphaba’s hat which would allow fans to interact with props from the show increasing engagement and excitement for the musical/movie. It could then develop further into sharing people wearing the filter on social media which will help promote the musical/movie.
Virtual Reality (VR)
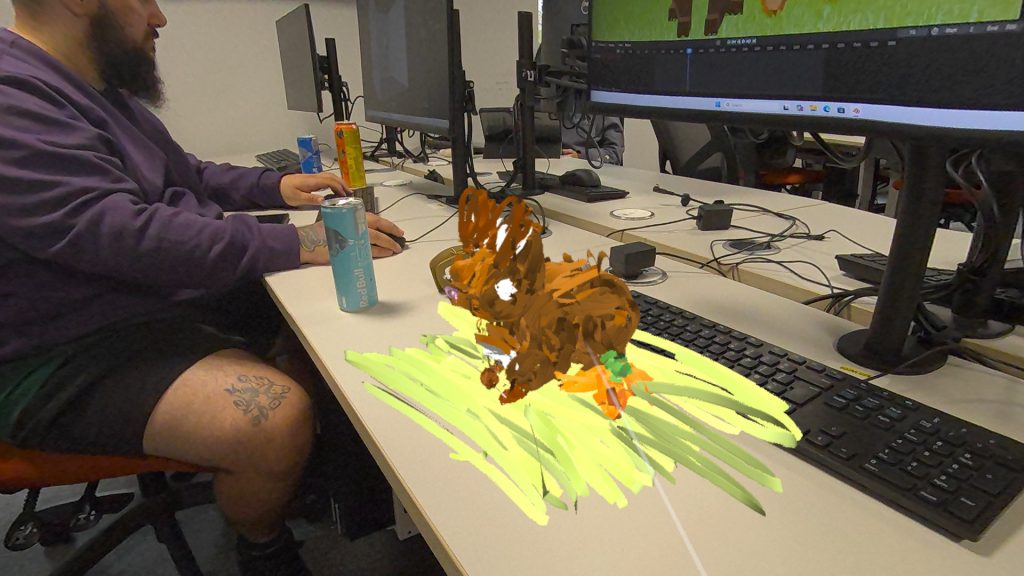
Using a VR headset, i created a replica of my rabbit model to see how it would look in vr instead of a 360 rendered scene. I used a paper texture to give it a hand-crafted, illustrative feel and to give a sense sense that the rabbit was made from the pages of a book. Using the immersive tools in the painting software, I was able to manipulate the model in a three-dimensional space allowing me to explore the rabbits form from multiple angles. The VR environment allowed me to engage with the model with the scale as it gave a sense of presence and physicality that isn’t possible on a flat screen. To develop the scene further, i would create a bigger field with more animals and features such as trees and bushes to build a place that creates a calm and inviting atmosphere.
One of the issues I encountered whilst working in VR was understanding the depth perception. Initially it was difficult to judge the size and distance of objects which made positioning elements accurately a little tricky – especially when creating the eyes of the rabbit, however, after spending some time interacting with the space and experimenting, I adjusted quickly. This issue highlighted how VR requires a different approach to spatial reasoning compared to traditional 2D screens.
Reddit.com. (2021)
References:
RepuNext (2025). The Impact of 360-Degree Videos on Digital Advertising Campaigns [online] Available at: https://www.repunext.com/impact-of-360-degree-videos-on-digital-advertising/ [Accessed 2 Nov. 2025].
Kevin McDonnell (2022). The future is shaped by the curious – Kevin McDonnell. [online] Available at: https://kevinmcdonnell.co/curiosity-zone-framework/ [Accessed 2 Nov. 2025].
Brown, E. (2015). How to evoke ‘Curiosity’ in design? [online] DesignMantic. Available at: https://www.designmantic.com/blog/designing-hacks/evoke-curiosity-design/ [Accessed 2 Nov. 2025].
Swift, T. (2020). Willow. Republic Records. [Accessed 2 Nov. 2025].
Reddit.com. (2021). Reddit – The heart of the internet. [online] Available at: https://www.reddit.com/r/aww/comments/nsum0x/ring_for_carrots/ [Accessed 3 Nov. 2025].